In this section we consider how to draw some shapes and specific angles using only a straight edge and compasses.
We begin by drawing the key constructions.
Worked Examples
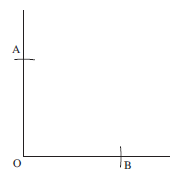
Construction of a Perpendicular at a Point on a Line
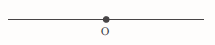
Construct a perpendicular at a point, O, on a line.

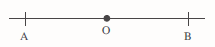
Use compasses to mark points A and B on the line that are at equal distances from the given point O.
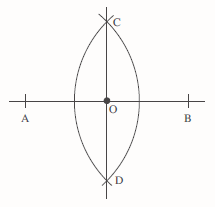
Draw arcs centred at A and B. These two arcs intersect at C and D. Then the required perpendicular line can be drawn through the points C and D.
Construction of the Perpendicular Bisector of a Line Segment

Construct the perpendicular bisector of the line AB.
Then label the midpoint of AB, M.
There are many lines that cut AB exactly in half. We have to construct the one that is perpendicular to AB.
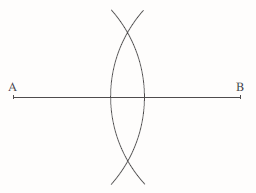
We begin by drawing arcs of equal radius, centred on the points A and B, as shown in the diagram.
The radius of these arcs should be roughly to of the length AB.

Then draw a line through the intersection points of the two arcs. This line is the perpendicular bisector of AB.
The point where the perpendicular bisector intersects AB can then be labelled M. M is the midpoint of AB.
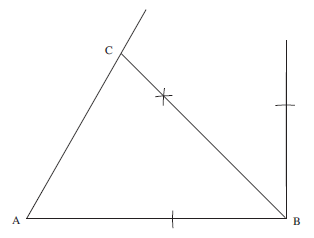
Construction of the Perpendicular to a Line from a Point not on the Line
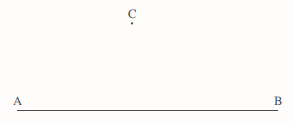
The diagram shows the line AB and the point C.
Draw a line through C that is perpendicular to AB.
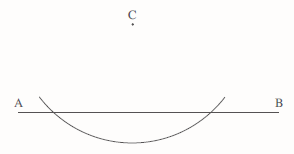
Using C as the centre, draw an arc as shown.
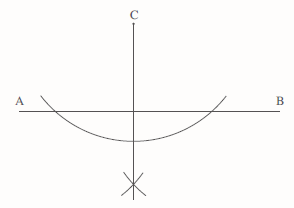
Then using the intersection points of this arc with the line AB as centres, draw two further arcs with radii of equal length. The perpendicular line can then be drawn from C through the point where these two new arcs cross.
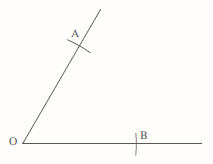
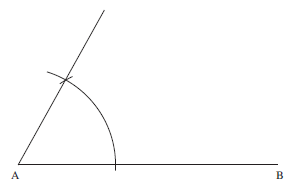
Construction of the Bisector of an Angle
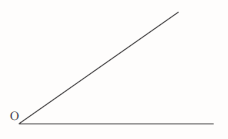
Bisect this angle.
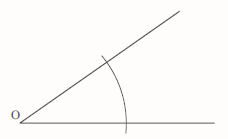
To bisect an angle you need to draw a line that cuts the angle in half.
First draw an arc using O as the centre.
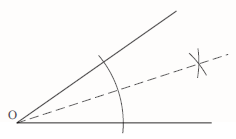
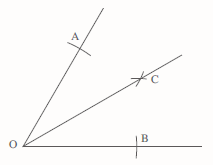
Then draw two further arcs of equal radius, using the points where the arc intersects the lines as the centres.
The bisector can then be drawn from O through the point where these two new arcs cross.
Uses of these constructions
Construction 1: To draw an equilateral triangle
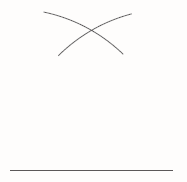
Draw one side. Then draw two arcs, one from each end of this side, with radius the same as the length of the first side of the triangle.
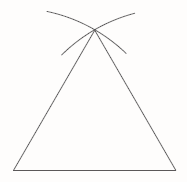
Join the ends of the line to the intersection of the arcs to complete the triangle
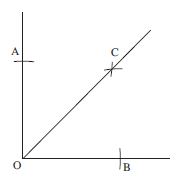
Construction 2: To draw an angle of 60°
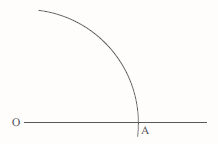
If the angle of 60° is to be drawn at O, draw a line through O that will form one side of the angle. Then draw an arc, with the compass point at O, crossing the drawn side at A, as shown above.
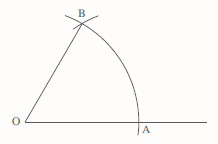
Draw a second arc, of the same radius, with the compass point at A, intersecting the first arc at B. Then join O to B to complete the angle
Construction 3: To draw an angle of 30°
First draw an angle of 60° using the previous construction, then bisect that angle using the method described in Worked Example 4 earlier in this section.
Construction 4: To draw an angle of 45°
Start by constructing a 90° angle using one of the methods described in Worked Examples 1, 2 and 3. Then bisect that angle using the method described earlier in Worked Example 4.
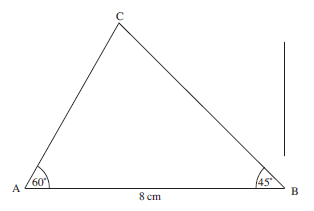
Construct a triangle ABC with AB = 8 cm, the angle BAC = 60° and ABC = 45° .
Then measure
First draw a line of length 8 cm and label it AB.
Then construct an angle of 60° at the end A as shown below (see construction 2 above).
Extend the line AB and draw the line through B perpendicular to AB, using the method described in Worked Example 1.
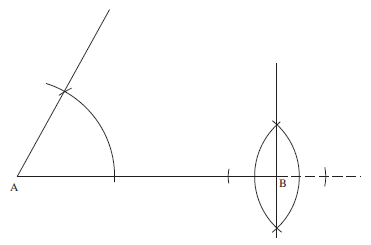
Using the method described in Worked Example 4, this right angle can now be bisected to give the 45° angle that is required. This is shown in the following diagram and completes the triangle.
The triangle is a shown below:
BC
BC = 7.2 cm
AC
AC = 5.9 cm
the angle ACB.
∠ACB = 75°
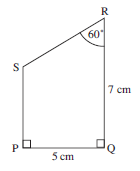
Use a ruler and compasses to construct the shape PQRS as shown opposite.
First draw the line PQ, with length 5 cm, and then construct perpendicular lines through P and Q using the method described in Worked Example 1. Measure 7 cm along the perpendicular through Q and mark in the point R.

Now, using the method described in Construction 2, construct a 60° angle at R to complete the shape.
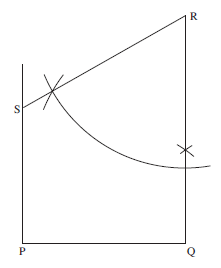
The shape PQRS is shown below:
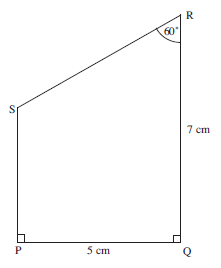
Then measure
RS
RS = 5.8 cm
PS
PS = 4.1 cm
the angle PSR.
∠PSR = 120°
Exercises
